Python, Pillow and Images
In the previous lesson, you loaded the third-party Pillow library into your project. In this lesson, you'll see how to put it to use
You can start a new project for this, if you want. Or just delete the code you already have in FirstFile. What we'll do is to insert an image onto a tkinter form, and then rotate the image 90 degrees. You can either use an image you already have, or save the one below (right-click the image):

The imports we need are for tkinter and the Pillow library, which is shortened to PIL:
import tkinter as tk
from PIL import ImageTk, Image
You've met the tkinter import in a previous section. For the PIL library we only want to import the modules called ImageTk and Image. We don't need anything else for this tutorial.
As previously, we can set up a tkinter form and add a title:
form = tk.Tk()
form.title("Rotate Image")
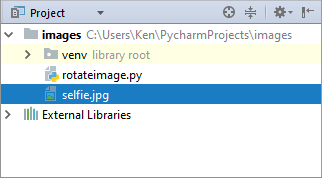
For the next part, you need to add your image to the project. Navigate to where your image is on your computer. Copy it (CTRL + C on Windows). Highlight the top item in your PyCharm projects area:

Now paste the image (CTRL + V in Windows). You should see a dialog box:

You can rename the image here, if you want. Click OK and you should see the image in your project folder:
Now that we have an image, we can reference it in our code.
imageName = "selfie.jpg"
The PIL library has an object called Image. A function of this object is called open. Between the round brackets of open, you need the name of an image file you want to load:
openImage = Image.open(imageName)
Here, we're loading our selfie image and placing the whole thing into a new variable called openImage.
To rotate an image, just use the PIL function called rotate. In between the round brackets you need by how many degrees you want your rotation:
rotatedImage = openImage.rotate(90)
Now that we've rotated the image, we can point tkinter at this image:
img = ImageTk.PhotoImage(rotatedImage)
We're going to be placing the image in a label. Tkinter has an inbuilt function called PhotoImage that allows you point at one of your image files.
We can set up the tkinter label widget like this:
labelWidget = tk.Label(form, image=img)
The parameter image lets you load an image in your labels. Our image is in the variable called img.
Finally, we can pack and display it using a mainloop, as we did previously in the tkinter section:
labelWidget.pack()
form.mainloop()
Your code should look like this:

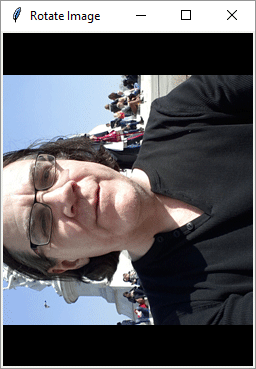
Run your program and you should see the image you used appear on a form, only rotated 90 degrees:
NOTE: If you're using Linux and you get an error that says "ImportError: No named _tkinter, please install the python3-tk package" then open up a terminal window. Type (or copy and paste) the following:
sudo apt-get install python3-tk
You may need to close down PyCharm and try again. Fingers crossed, you'll be fine!
If you'd like to explore Pillow image manipulation further, the online manual is here, at the time of writing:
https://pillow.readthedocs.io/en/3.0.x/handbook/tutorial.html
In the next section, we'll take a look at Python classes.