Python Form Design
We're going to do some work with tkinter. We'll produce a form with textboxes, labels and a button that you can click. From now on, we'll assume you've upgraded to a version of Python 3 or greater. (Python 2 will be phased out, eventually.)
Start a new project and add a Python file. At the top of the blank file, import tkinter:
import tkinter as tk
After tkinter we have as tk. This is so that we don't have to keep typing tkinter every time we want a form object. We can just use the tk variable.
We still need to set up a Tk object, though. So add this line below the one you have:
form = tk.Tk()
This sets up a variable that we've called form. It means you can refer to the form object with just the word form. Type the word form on the next line. Now type a dot. You should see a popup box appear with things you can do with your new form object:
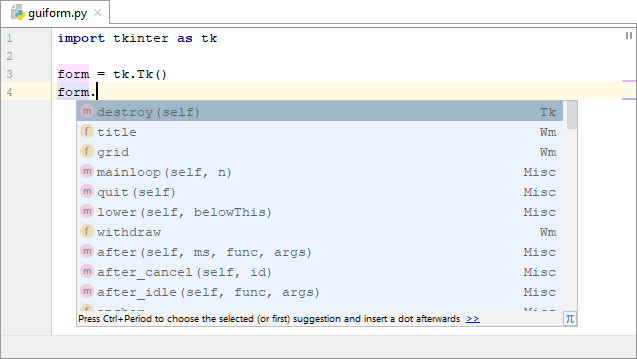
Now type a letter t. The list should show you an option for title:

Double click title to add it to your code. Now type a pair of round brackets. In between the round brackets of title type "My First Form" (with the quote marks, either single or double).
In order for your form to stay on screen and not disappear, you need to add the mainloop function. Add this line:
form.mainloop()
Your code should look like this:

You can run your program now. What you should see is a blank form with your title at the top. Here's what it looks like in Windows 10:
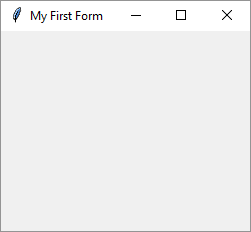
If you're coding on a different operating system, your form will look different to the one above.
Linux Users
If you're using Linux and you get an error that says "ImportError: No named _tkinter, please install the python3-tk package" then open up a terminal window. Type (or copy and paste) the following:
sudo apt-get install python3-tk
You may need to close down PyCharm and try again.
Close your form down. (You can click the feather icon and select close from the menu that appears. Or just click the X symbol in the title bar.) Now let's add a label to the form.
Just before your mainloop line, add the following:
myLabel = tk.Label(form, text="This is a Label")
The first item between the round brackets of Label is form. This should be the variable name that holds your form object. We called ours form, but it doesn't have to be called form. That's just a variable name we came up with.
After a comma, you have a wide range of choices you can use with the Label object. One of these is called text. (You'll see more soon.) After an equals sign and no spaces, type whatever text you want on your label.
Finally, add this line:
myLabel.pack()
Your code should look like this:
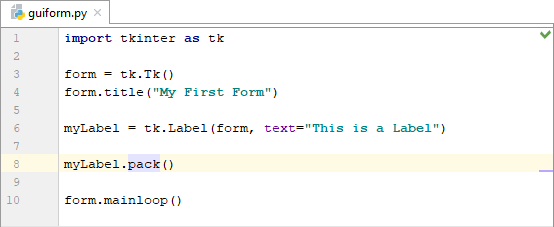
The pack at the end of the myLabel variable is something called a layout manager. There are two others to choose from, grid and place. The pack layout simply packs objects onto your form wherever there is space. It's not used for precision placement of form controls, but used for a nice, quick an easy solution. We'll use the grid layout in a later tutorial.
If you like, you can add the pack after label:
myLabel = tk.Label(form, text="This is a Label").pack()
But it looks a lot less confusing on a separate line.
Run your program. Your form will look rather small:

Your form might be so small on Windows and Linux that you have to drag the edges to increase the size.
The reason it's so small is that by default, a label will be just big enough to hold its text. You can add a height and width between the round brackets of Label:
myLabel = tk.Label(form, text="This is a Label", width=25, height=5)
Make a note of where all the commas are in the above code. There's one after the text and one before height. But you just set numbers for the width and height parameters.
So that you can see your label, you can add a background colour with the bg parameters:
myLabel = tk.Label(form, text="This is a Label", width=25, height=5, bg="red")
Before you try it out your code should look like this:

Run your form again:
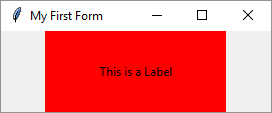
You may need to drag the edges to see the same as ours.
Now add another label:
myLabelTwo = tk.Label(form, text="This is also a Label", bg="blue")
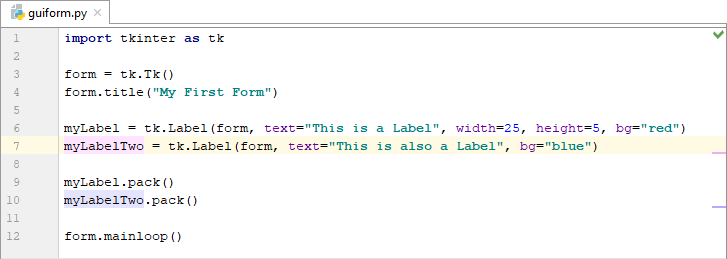
Make sure you add myLabelTwo.pack() just before the mainloop line. Here's what your code should look like:
Run your form to see this:
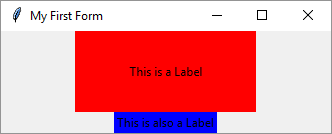
The black text on a blue background is hard to see. To remedy that, there's an fg parameter, short for foreground. Change your second label line to this:
myLabelTwo = tk.Label(form, text="This is also a Label", bg="blue", fg="white")
Run your program again and the second label should be more readable:
You can change the font type as well:
font="font_type, font_size, bold, italic"
Try it out. Add a font parameter after the fg one:
tk.Label(form, text="This is also a Label", bg="blue", fg="white", font="Arial 14 bold italic")
Notice that your font information goes between quote marks and that you don't need any commas before the first and last quotes.
You can have more than one line on your labels (you can even have images, which we'll do in the database section). To add new lines, just use the newline characters (\n) in your text parameter. Like this:
myLabelTwo = tk.Label(form, text="This is also a Label \n and has a second line")
To position the text in your labels, you can use the anchor parameter. The default is center (American spelling). The others use compass points:
anchor='w'
The points you can use are (all in lowercase): n, e, s, w, ne, se, sw, nw. Try this on your first label:
tk.Label(form, text="This is a Label", width=25, height=5, bg="red", anchor="w")
Run your program and you should see the text aligned to the left. Try out the other compass points and see what they look like.
For aligning multiple lines of text, you can add the justify parameter. The options to use after an equals sign are left, right, center (American spelling, and the default). Try this on your second label (it should be one long line):
tk.Label(form, text="This is also a Label\nand has a second line", bg="blue", fg="white", font="Arial 10 bold italic", justify="right")
Notice that we've closed up the space around the \n characters.
In the next lesson, we'll design a text entry form in a grid layout.